
by Anthony Junta
If you like what you're reading, you can support Anthony and Team Foundry by placing your Foundry orders through the link below. 10% of every sale completed through the link goes directly into the Team Treasury.

Introduction
Welcome to FAB Foundry's Uprising Limited Set review! Below you'll find my ratings for every non-token card in the new set. Each has a letter grade and a short rating rationale.
Before we dive in I wanted to briefly discuss a couple of terms. I'll frequently refer to cards as on (or off) rate. This refers to the power of a card relative to the cost and pitch. For example, at red, a 0-cost attack with 4 power is on rate (Wounding Blow). Same goes for a 1-cost with 5 power and so on. Cards that deviate from this will be described as above or below rate.
Here's a quick grading table:
|
Grade |
Description |
Example |
|
A |
Highly flexible cards or cards that can swing momentum in your favor. Cards that can take over or finish a game. |
Awakening; Channel Mount Heroic |
|
B |
Good cards that draw you to a class when you open them in Sealed or that can be read as signals in Draft. |
Overflex; Evergreen |
|
C |
Average cards that will make up the majority of your deck. Getting a critical mass of these is key to a functional deck |
Heaven's Claws; Arcanic Shockwave |
|
D |
Very narrow cards, cards that have a very marginal effect or are a liability to have in your deck. |
Ragamuffin's Hat; Rejuvenate |
|
F |
Not worth having in your deck. Doesn't do anything or could even be harmful. |
Eclipse |
By all accounts, Uprising is looking to be a great, if unconventional, Limited Set. The Heroes here seem pretty siloed in terms of the cards they want. Even many of the Draconic and Generic cards seem to lean towards a hero, so it might be difficult to stay open and read the table in Draft.
The three Heroes here seem to offer a good range of speeds and strategies. Fai seems likely to set the pace of the format, with Dromai trying to build her board towards a winning position, and Iyslander trying to disrupt and slow her opponents before burning them out with Arcane.
Draconian Illusionist/Illusionist
Dromai is our Illusionist for the set, and while definitely a different vibe than Prism, she seems like she might play similarly. She has a couple big, above-rate Illusionist attacks and an ability to build a board state that becomes impossible for your opponent to manage. She'll want to have some good defensive options to get her to that point. Rather than Heralds, Dromai gets phantasmal Dragons but, luckily for her, 6-power poppers are very rare in this set. When evaluating your Sealed pool and looking for signals in Draft, look for Invocations and cards that create Ashwings. Also look for cheap Reds with 'Go Again' that can turn on her ability and grant this to her Dragons too.
003 - Storm of Sandikai - N/A
There aren’t any majestic weapons in the set, so you’re stuck with the token weapons for all of our heroes this time around. Storm of Sandikai is the only way to attack with your Dragon’s so you definitely need it, but it’s just going to sit on the battlefield all game. 0-cost to attack means you only need to worry about paying the invoke cost (and any Frostbites you may have picked up) the first turn you attack with a dragon. Then any dragons you carry into the next turn will be free to attack. This can give you good options to create a long chain of attacks if you can build , or a free counter attack even if you block with your entire hand.
004 - Silken Form - B-
Being able to create an Ashwing on demand seems like decent value here. The standard play pattern here will probably be to Quell 1 pitching a red and creating an Ash with Dromai's ability; then activating the instant ability on Silken Form before the end step to make an Ashwing. Just be careful about doing so if Fai is floating an action point.
A quick note about Quell: Quell is surprisingly powerful against all Heroes in the set and you’ll definitely want to have a couple items with it. Against Fai and Dromain you can pitch a blue and get multiple uses out of Quell helping with breakpoints and soaking multiple Phoenix Flames or Ashwings. Against Iyslander while there is some Arcane Barrier in the set, it is hard to get above 1 AB, so you’ll want to have some Quell to prevent Iyslander’s bigger Arcane attacks.

005 - Burn Them All - C-
Burn them all needs you to reliably have Dragons on the field to do anything, it’s really only viable in the late game, and even then it’s only representing 3 - 4 damage in most cases. You'll need to banish 3 Reds to get 3 activations off Burn Them All, 6 Reds for 4, and 10 Reds for 5. You can pitch this early to make an Ash and power up your Dragons in the late game and it is a 0-cost Red that can give all your Dragons ‘Go Again,’ but, overall, this is too conditional for me to be very excited about it.
006 - Invoke Dracona Optamai // Dracona Optimai - B
Dromai's Majestic dragons are difficult to rate. They are powerful but expensive (especially given Draconic's red leanings. When you play them, they might win you the game, but they are a hefty investment (at least three cards and an Ash token) and having them popped with Phantasm puts you way behind on tempo. There will also be hands where these are just a blank block 3 because you won't have the resources to cast them. That said, there are only 1 Common, 3 Rare, and 2 Majestic poppers in the set, so they will be pretty hard to come across. The upside generally makes all these worth putting in your deck in Limited. Just don't get tunnel vision on playing them and know when to just use them to block. If you do see your opponent trying to pitch stack these, I’d also try to make sure you have a popper available in the second cycle for when these come around again.
There's no denying the power of Dracona Optimai; it swings for up to 12, with 6 of that power potentially coming in a single instance of Arcane. If you get to attack twice with Optimai, I think you're very likely to win the game; and late in the game, even a single attack could be devastating. But 6-cost is also wildly expensive in a deck that wants to run a high red count to make Dromai’s Hero Powers function. I expect Optimai is a card you'll need to set up with pitch stacking, in which case it could be a great finisher. Even if this gets popped later in the game it leaves a chunk of Arcane damage which offers some consolation. 6 health is also a lot, so you can count on your opponent needing to invest multiple cards to taking this off the field if you do get it to stick.
007 - Invoke Tomeltai // Tomeltai - B-
Tomeltai suffers similar issues to Dracona Optima: it's quite expensive for red-heavy decks and investing three cards in this only to have it popped is quite painful. You still get the effect, but in Limited I think this is quite a bit less valuable than the hefty chunk of Arcane damage that Dracona Optima. Still, it blocks for 3 and can snipe a piece of equipment. Tomeltai is a bit easier to cast, but you still probably need to set this up with pitch stacking or a multi-turn Arsenal (which carries its own risks). If you can manage to keep Tomeltai on the board, things will get out of hand for your opponent quickly.
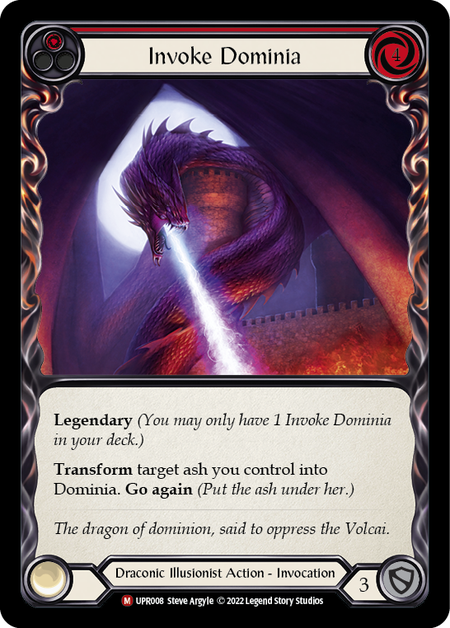
008 - Invoke Dominia // Dominia - A-
Dominia is my favorite of the three Majestic Dragons. 4-cost is getting a bit more reasonable to cast and Dominia still poses a potent threat. The ability here is great, although only checking the top card does make it a bit more inconsistent. If you do hit, it strips a card from your opponent’s hand. This means that you have some protection against the attack being popped and if they don’t have a popper you can make it more difficult for them to kill Dominia the following turn by taking resources or big attacks off the field. Dominia is the Majestic Dragon you’ll most likely be able to cast and the Dragon you’ll most likely be able to keep on the battlefield for more than one turn, making it my pick of the three.
009 - Invoke Azvolai // Azvolai - B+
As we move to the Rare Dragons, the costs get more manageable. The upside isn’t quite as high with these, but all the Rare Dragons are worth playing in your Dromai decks. There just aren’t enough poppers in the set to really feel the downside of having a bunch of Phantasms and the Dragons are really the reason you’d be wanting to play Dromai in the first place.
Invoke Azvolai costing 0 is a welcome relief after all the big hitters mentioned above. That means you’ll always be able to attack with this with ‘Go Again’ as long as you have an Ash available. It threatens 3 damage to your opponent, but the split across Arcane and Physical damage is nice. Azvolai will really excel in the mirror, casting it and blasting two of your opponent’s ashwings off the board for the cost of a single card is huge tempo swing, and could be decisive in that matchup. 3 Health is a still a little fragile and dies to Searing Emberblade, but it’s generally trading 1-for-1 at the worst.
010 - Invoke Cromai // Cromai - B+
Cromai’s biggest asset is that it offers you some resilience against poppers. Rather than your turn just coming to a halt if your phantasmal Dragons get broken, Cromai pays you back with an extra action point, so that you can still follow up with your Ashwings and any other Dragons on the battlefield. Cromai should always be the first Dragon you attack with (after playing a red card to give it ‘Go Again,’ of course) and should be a must kill target for anyone playing against Dromai with poppers still in their deck. 2 Health means it’s generally trading for a card and 3 power for 0-cost is fine, but the real value here is the ability.
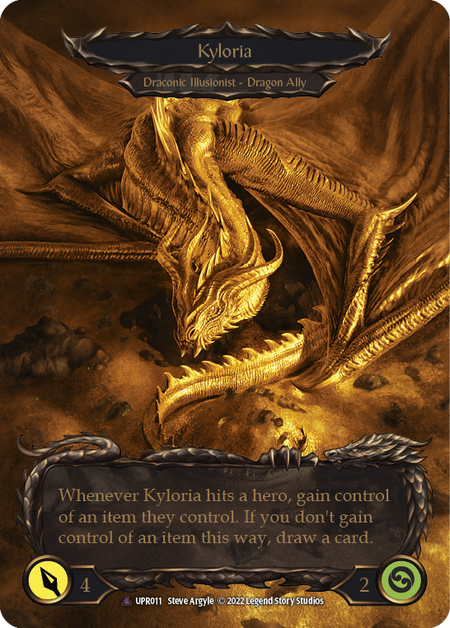
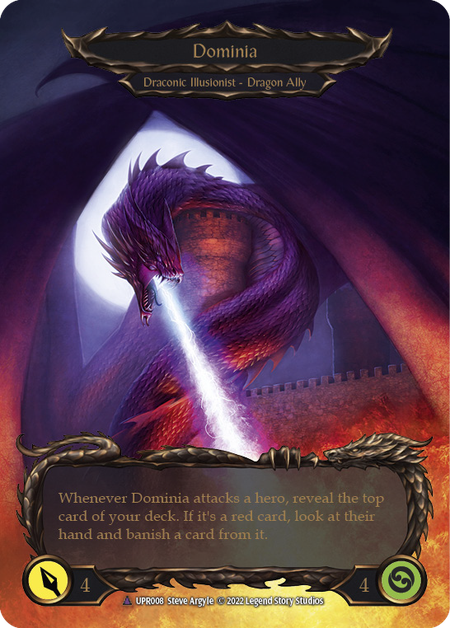
011 - Invoke Kyloria // Kyloria - A-
There isn’t a single item in this set for Kyloria to steal, so this is threatening a draw on hit with ‘Go Again’ at 1-cost. The ability is pretty powerful, especially with so many cheap red cards in the set for you to pick up with the draw. 4-power is a nice break point as well which makes blocking this “must-kill” Dragon annoying for your opponent. 2 Health again keeps her out of the range of the 1-damage pings but I wouldn’t really expect this to stick around for more than 1 turn very often.
012 - Invoke Miragai // Miragai - B+
Miragai is another Dragon that provides some resilience against poppers and having your whole turn stopped. It’s not a great attacker on its own so this is a Dragon that you would ideally want to pair with something a bit more threatening. Unlike Cromai, you probably don’t want to attack with Miragai first (if you have other options); you more likely want to save it for last to avoid giving your opponent value by killing Miragai and stopping your turn at the same time. 4 Health here is pretty good; it gets Migagai out of range of Searing Emberblade and means your opponent will need to invest a good amount of their turn to kill him.
013 - Invoke Nekria // Nekria - A+
Nekria is beefy at 7 Health and 4 Power. It’s also a bit expensive at 3-cost, but that still means you can play and attack with this (with ‘Go Again’) off just a two card hand. Losing health whenever it deals damage is barely a downside since it gives you an Ash for further board development every time it takes a counter. The ability does make Nekria a little more vulnerable to pings, but whether from her own attacks, or your opponents, it's hard to get too upset when Nekria leaves behind a pile of Ash for you to rebuild. Regardless, Nekria will take a good amount of investment from your opponent to get it off the battlefield and should slow down your opponent one way or another. Nekria is the type of threat you’ll really want a popper for. If you see it pitched early, make sure you save a 6-power attack for later.
014 - Invoke Ouvia // Ouvia - A
Ouvia is another great value play. She gives you two Dragons (as long as you have another Ash available) off of one card. Note that the Ashwing doesn’t transform until she enters the battlefield, so if you pitch at least one red to play Ouvia, you’ll have an Ash available. She then threatens to keep the train rolling if your opponent doesn’t deal with her by the start of your next turn. Ouvia offers one of the best ways to reliably make Aether Ashwings and at 6 health she is pretty costly for your opponent to remove. Even though she only attacks for 1-power, the pings will quickly add up especially if she is bringing an Ashwing to the party at the start of every turn.
015 - Invoke Themai // Themai - B
Themai is a decent body at 3-Power and 4-Health. He stays out of range of Emberblade and is a decent threat even if he can often be blocked with a single card. While playable in all matchups, Themai will really shine against Iyslander; though she can still respond to you playing the invocation on the first turn you play play Themai, if she’s not able to remove it the following turn you’ll likely get a decent reprieve from her frostbite tokens. 2-cost is reasonable for the stats and the upside you get versus Wizard with this in your deck. As a minor benefit this also turns off Sand Cover in the mirror.
016 - Invoke Vynserakai - B+
Vynserakai hits really hard, threatening 9 damage off just 3 resources, an extremely powerful two-card hand. There are still a good number of 2-block cards in the set so Vynserakai can be awkward for your opponent’s to cover up. He is extremely fragile though, only 1 Health means he dies to an opposing Ashwing, Phoenix Flame, or Singe, and I doubt you will really ever get the chance to attack with him twice. I still think you get enough value off of just swinging once, as it takes at least two cards from your opponent to full block and avoid the Arcane damage.
017 - Invoke Yendurai - B
Yendurai is a much more resilient threat than our previous Dragon. Assuming you avoid a popper, Yenduari will almost always eat at least two attacks from your opponent before leaving the battlefield thanks to his ability. 3-Power is perfectly serviceable and your opponent may be tempted to let him stick around rather than waste two attacks.
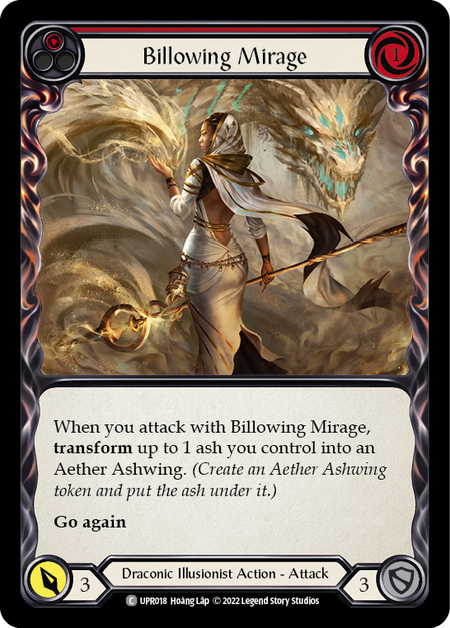
018-020 - Billowing Mirage - B-/C-/C
Billowing Mirage is a good way to get an Aether Ashwing while also presenting some damage on the combat chain. The red version here is best because it ensures your newly created Ashwing can also attack with ‘Go Again’ as well any other Dragons you might have on the board. 1-cost here isn’t a bad rate and if you pitch a Red to pay for this it will ensure that you have an Ash available. The Blue version is also enticing as a resource card that still functions to help you build your array of Dragons. Blocking for 3 is also good flexibility.
021-023 - Dunebreaker Cenipai - C+/C/C-
Dunebreaker Cenipai has Phantasm, but we already know 6+ power attacks aren’t super available and if it does get destroyed it compensates you with an Ash at least. With built in ‘Go Again’ the Red version is another good way to get your Dragons going and represents a decent chunk of damage itself. I don’t mind the Yellow and Blue as resource cards either, especially with Yellow still coming in at the 4-power breakpoint.
024-026 - Dustup - B/C-/C-
I really like the Red version here as a 0-cost, 4-power attack with a good hit effect that also gives all your Dragons ‘Go Again’ for the turn when you play it. Getting to make an Ashwing when this connects is great value and it will be hard to be too upset if your opponent has to commit two-cards to blocking this either. The Yellow and Blue versions drop off a bit, as the effect here is conditional, but they still block for 3 and threaten to create an Ashwing if unblocked.
027-029 - Embermaw Cenipai - B-/C+/C+
Similar to Dunebreaker Cenipai this pays you back with an Ash if it gets popped. Instead of ‘Go Again,’ Embermaw Cenipai offers you a boost in raw power. An 8-power attack off a two-card hand is pretty potent in a set without many poppers. I also like the Yellow and Blue versions here as early pitches that can still be a serious threat in the late game regardless of your board state. Even if your opponent has managed to keep your Dragons off the battlefield, Embermaw Cenpai threatens a good chunk of damage and gives your deck a solid back-up plan of just hitting with big above-rate attacks.
030-032 - Sweeping Blow - D/D-/D+
The closest comparable for Sweeping Blow is Billowing Mirage. Both are 3-power at Red with ‘Go Again’ and an effect. Rather than Transforming an Ash, Sweeping Blow creates one, but I expect that Transforming Ash into Aether Ashwings will be a bigger restriction than creating Ash, as Dromai gives you one every time you pitch a Red. Because I think creating Ash will be fairly easy, I’d prioritize Sweeping Blow below many of the other Illusionist cards, though it does go up in value if you have a lot of effects that create multiple Ashwings like Ouvia or Rake the Embers. I like the Blue version best as a resource card with some late game utility.

033-035 - Rake the Embers - A-/C+/F
Rake the Embers is the best way to get multiple Ashwings out in a single turn and start to build a board. It’s also one of the best ways for Dromai to get to 4 Chain Links to activate Rupture. Since Rake creates an Ash itself and costs 1 play, it's pretty easy to get full value out of the card (only the Red version requires you to have another Ash going in). The Red version is definitely my favorite here as it gives all your new baby Ashwings ‘Go Again’ itself and creates a decent spread of threats all on its own. The Yellow is still reasonable, but with this only blocking for 2 (the first Illusionist card that hasn’t blocked for 3) I don’t love paying 1-resource and full card just to make one Ashwing (off the Blue) even in the late game.
036-038 - Skittering Sands A-/C+/C-
Skittering Sands makes you an Ashwing and turns it into a threat all on its own. The Red version is again my favorite for its ability to give your Dragons ‘Go Again’ and gets you to a 4-power break point. This is a great play off a one-card hand if you have an Ash available. The Yellow and Blue drop off a bit and this does only block for 2, but at 0-cost it’s hard to hate.
039-041 - Sand Cover - B-/C/D+
Sand cover is a good defensive card. It can block both Physical and Arcane damage and as an Instant you really aren’t risking losing this to a one damage ping if you are patient with it. It is a bit conditional in that it requires you to have an Ash available but I don’t expect that to be a huge hurdle. There are also a couple of attack reactions in the set, so this does give you the benefit of having some defensive responses at Instant speed. Even though this can’t be used to protect your allies, 0-cost for 4 defense on the Red version is good value. The Yellow and Blue aren’t quite as exciting and there probably will be some situations where you don’t have an Ash available and this is useless, so I knock it a bit for that.
151 - Ghostly Touch - F
This is bad in Limited. You won’t have that many attacks destroyed by Phantasm with the amount of poppers that exist in this set, so at 3-cost to attack this is never going to be good value for you. Even if you do attack with it, it has Phantasm itself and risks getting sent to the graveyard. Maybe this gives you something to do if the game goes to fatigue, but it has no block, no Quell, no Arcane Barrier, and a limited number of attacks. Silken Form and Quelling Sleeves are better in every Dromai deck, if you do draft this for your collection and miss out on any other arms, you can equip it to show it off, but you’ll probably be making a mistake if you ever activate it.
152 - Silent Stilettos - B
Silent Stilettos offer you some additional resilience to having your attacks/Dragons popped by Phantasm, which is great for Dromai, though 3-resources is a pretty steep cost for Red-heavy Dromai decks. Having Arcane Barrier 1 is also a nice perk for the Iyslander matchup but the main use for these will be recovering your action point. Since these are single use, you’ll want to make sure you have meaningful follow-up attacks before using these. It might not be worth it to spend 3 resources and your boots just to get another Ashwing in.
153 - Frightmare - F
This is too conditional to play in Limited. You need to have already attacked with a Phantasm, your opponent needs to have popped it, you need to have a way to have recovered your action point (not that many in Limited) and have a Blue in hand to pitch to pay for this. This doesn’t block, doesn’t pitch, and will probably only be playable in <5% of your Limited games. Save this for your Prism deck in CC.
154 - Semblance - A
Semblance is a blowout for your opponents. You effectively waste a 6-power attack they’ve used to try to break one of your Phantasms after they have already committed to blocks, making this a way to recover your Action Point as well as an attack reaction that could easily punch through 3-5 damage your opponent wasn’t expecting. It’s pretty expensive and doesn’t block, but it’s a good resource card and the upside here is definitely worth it.
155-157 - Transmogrify - B/C+/C+
Transmogrify won’t affect any of your Dragons, but it can pretty frequently represent somewhere between +3 and +5 on your next attack card. It’s a great card to pitch early alongside another cheap, Blue resource card to turn your early game resources into real threats late. I don’t see adding Phantasm as a huge cost given the limited availability of 6-power attacks. Unsurprisingly, I like the Red version best to turn on ‘Go Again’ with Dromai, but the Blue and Yellow have some utility that makes them decent resource cards.
Draconic Ninja/Ninja
Fai seems to be the most aggressive hero in Uprising. He wants to go wide around the opponent's blocks and leave them with tough decisions about whether to prevent damage now or wait to stop a potent hit effect later. Your cards might not have the Combo keyword, but sequencing is still important for Fai to get the most out of his turns. When evaluating Fai, I am looking for Draconic attacks with 'Go Again' and some good payoffs with Rupture for going wide.
046 - Searing Emberblade - N/A
Again, there’s no Majestic alternative here, so you’ll be stuck with Emberblade for Fai in Limited. Thankfully Searing Emberblade is pretty good. A 2-cost attack for 3-power with ‘Go Again’ (assuming you are able to play another attack first) might seem a bit underwhelming, but this also counts as a Draconic chain link, powering up Fai’s ability (or reducing the cost at least) and all your other Draconic cards that care about the length of the Combat Chain. 3-power is also good enough to kill a good number of the the Rare Illusionist Dragons which is nice.
047 - Heat Wave - B+
Heat Wave is a great way for Fai to pump up his biggest combo turns. You should be able to eek 2-3 power out of this pretty frequently, as there are a decent number of ways to recur your Phoenix Flames and go wide. It being an Instant is also quite nice as you can see how your opponents are blocking/using Quell before you decide whether or not to go for it. You probably only want to use this on your turn, so Quell is a little less valuable here than on the Illusionist arms but it can still come in handy against Iyslander and there might be situations when you’re on the backfoot and Quell is more valuable than the added attack.
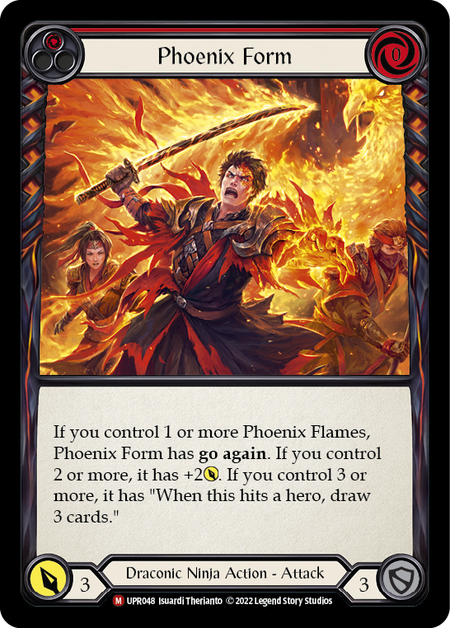
048 - Phoenix Form - A
Phoenix Form is a great late game card once you have access to multiple Phoenix Flames in the Graveyard. At one Flame a 0-cost, 3-power attack with ‘Go Again’ is serviceable. At two Flames, 0-cost, 5-power, ‘Go Again’ is probably one of the best cards in your deck. Getting the draw 3 with three Flames is the dream, but I wouldn’t hold out for it if you have a good window to play this with only two Flames on the Chain. This doesn’t really help you get a Chain started, but it’s always playable (even blocking for 3) and the upside here is too good to pass up.
049 - Spreading Flames - B+
Spreading Flames, on the other hand, is a good Chain starter. Play this first and your Phoenix Flames are all attacking for 2, this even affects Emberblade (if you can get to 4 links), and can be played with Spreading Flames for just a single Blue. As long as you get two triggers off this you are probably happy and anything more is great value. It doesn’t block well, but Fai has such an aggressive leaning, I’m not as worried about the block values for this Hero.
050 - Combustion Point - A-
Combustion Point is a great finisher. It’s really difficult to play around and can be a complete blowout. Without any big defense reactions in the set you are virtually guaranteed to be able to bounce a card with this if you are able to play it on your fourth Chain Link. Generally, I think you can get this to be a 1-cost, +4-power Attack Reaction. The fact that this can target any Draconic, Ninja, or Draconic Ninja attack gives it a lot of flexibility and the potential to steal games.
051-053 - Engulfing Flamewave - C+/C/D+
Engulfing Flamewave is a bit expensive at 2-cost and 5-power with ‘Go Again’. The effect here is powerful but also conditional: it has to hit and only cards with cost less than the number of Draconic Chain Links can be banished. You probably want to play this as at least the second Chain Link so that your 1-cost attacks are hits. This means it’s not a great Chain opener. It is a good way to try to force some blocks from your opponent as the upside is quite high. Red and Yellow are okay and it does have natural ‘Go Again’ but the Blue being covered up with a single block hurts.
054-056 - Mounting Anger - B+/C/C+
I like Mounting Anger quite a bit more than its predecessor. 1-cost means it pairs well with Emberblade and because you get to choose a card to banish from your hand rather than the top of your deck you are not likely to brick. This can also function as a good chain opener, allowing you to banish a Phoenix Flame or another 0-cost attack even as the first attack. I think the Red is best for coming in at the 4-power break point, but the Blue and Yellow are reasonable resource cards that still offer a marginal benefit if they go unblocked.
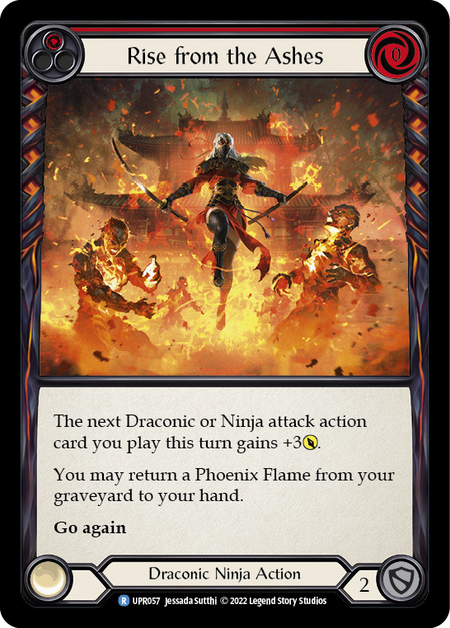
057-059 - Rise from the Ashes - A-/B+/B+
Rise from the Ashes is a good enabler for your cards that synergize with multiple Phoenix Flames. As a non-attack it won’t add to the Chain itself, but it grabs you a Phoenix Flame that will, just make sure you play this before your first attack so that you don’t break the Chain later. +3 Power for 0-cost at Red is on rate anyway, so getting the Phoenix Flame here is a great value. The Yellow and Blue versions are also great plays that offer flexibility as resources and combo enablers.
060-062 - Brand with Cinderclaw - C+/C+/C+
Brand with Cinderclaw is a great role player. It’s essentially Head Jab with the added value of upping your Draconic Chain Link count if you happen to have a Generic or Ninja attack in hand. This makes it an ideal Chain opener that I am happy to play in all 3 colors as on-rate attacks or cards with good flexibility.
063-065 - Cinderskin Devotion - C-/C-/C-
Cinderskin Devotion counts itself, so it is really only asking you to have played one other Draconic attack first. That is a pretty low bar with Fai frequently wanting to go wide, but it does mean you can’t use this to start your Chain and it doesn’t really offer any payoff on its own. It’s a fine filler card and is one of the few Ninja cards that block for 3, but that doesn’t add up to something that I want to take early. Since this is just pushing damage, I don’t see a huge difference between the 3 colors.
066-068 - Dust Runner Outlaw - C/C/CC
Compared to Cinderskin Devotion, I’m happy to give up a point of Defense to get built in ‘Go Again’ on Dust Runner Outlaw and have this be a viable Chain opener. 1-cost for 4-power with ‘Go Again’ is a fine rate for the Red and still pairs well with Emberblade off a Blue pitch. The Yellow and Blue still offer you the flexibility to start your Chain or fuel your turn, so I don’t mind playing those either.
069-071 - Lava Vein Loyalty - C-/C-/C-
Like Cinderskin Devotion, the lack of built in ‘Go Again’ means that Lava Vein Loyalty doesn’t work as a Chain opener. For that reason I like it a little less than some of the natural ‘Go Again’ cards (like Brand with Cinderclaw or Rising Resentment), but at 0-cost this can be an important part of getting you to higher Chain Link counts, free Phoenix Flames off Fai’s ability, and triggering your Rupture finishers.
072-074 - Rebellious Rush - C-/C/C
At 2-cost, Rebellious Rush is a little more expensive than I want most of my Fai cards to be. It does have natural ‘Go Again’ making it a viable chain opener in a pinch and it does pack a punch, but it’s my least favorite of the Chain openers we’ve seen so far. Here I actually prefer the Yellow and Blue pitch versions as resource cards with the fallback mode being to use it as my Chain Opener.
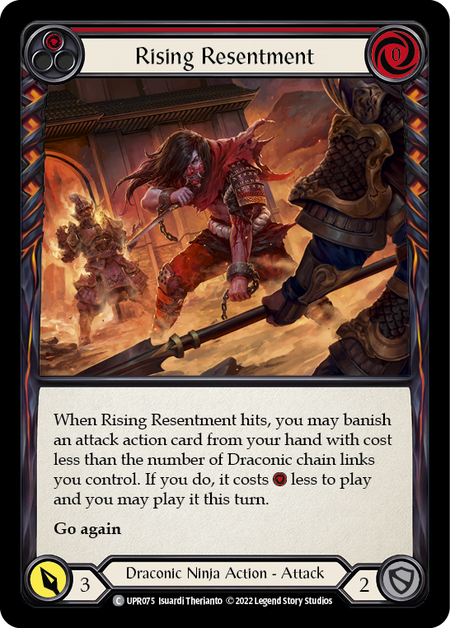
075-077 - Rising Resentment - B-/B/B
Rising Resentment gives you a lot of flexibility, which I appreciate. It has natural ‘Go Again’ so it’s a fine way to open the chain, but it also carries a pretty reasonable hit effect if you play it mid-Chain. I value the cost reduction as much or more than the +1 from Mounting Anger, and this costs 0, by comparison. It can be covered by a single block, but having this trade for a card from your opponent’s hand is a fine exchange. One quick note: even if you do use this as your opener, it's worth banishing a 0-cost attack against Iyslander, as you can potentially use the cost reduction to offset a Frostbite if she gives you one during your turn.
078-080 - Ronin Renegade - C-/C/C
This card is a bit confusing to me because it is just strictly worse than both Rising Resentment and Brand with Cinderclaw. It has the same stat line without any added abilities; but I suppose LSS just wanted to ensure there was a sufficient number of 0-cost ‘Go Again’ attacks in the set. I think all three versions are still totally playable in Fai, as Chain openers, resource cards (the Blue and Yellow at least), or just a way to get another Draconic Chain Link.
081-083 - Soaring Strike - B-/C/C
Soaring Strike’s hit effect is pretty intriguing. The idea of giving one of your generics ‘Go Again’ is pretty appealing but it’s also not an effect you want to count on having as you plan your turn or construct your deck. At 1 cost Soaring Strike isn’t too expensive and is on-rate for an attack with natural ‘Go Again’, making it a fine option for a Chain starter with a little upside as well. The Red will require a two-card block to turn off, so that’s my preferred version, but I think the others are playable as well.
158 - Tiger Stripe Shuko - A+
As we’ve seen, Fai has access to a ton of cheap attacks with less than 2 base power and with access to Phoenix Flames from graveyard, I can see games where you get a +1 trigger off of Tiger Stripe Shuko every turn of the game for 4-6 damage. The extra text on not being able to prevent the damage may seem not particularly relevant, but with Quell being one of the best ways to “block” multiple Phoenix Flames and low-power attacks it can certainly be a factor in the late game. The fact that this then blocks for 2 when you need a pivot means this really checks all the boxes for Ninja.
159 - Tide Flippers - B-
Giving ‘Go Again’ to a low-power attack at reaction speed is a good ability to have on tap (it’s not far from Snapdragon Scalers). So many of the Ninja cards already have ‘Go Again’ that you’ll most likely want to use this on a Generic or Draconic action that wouldn’t otherwise have it. Maybe the best part about Tide Flippers is the Arcane Barrier though. Since you won’t have the Arcane Barrier granted by Aether Ashwings this is probably going to be your only line of defense against Iyslander’s Arcane, though if you’re to the point of blocking it, it might already be too late.
160 - Double Strike - C+
Double Strike is a fantastic way to go wide and get around your opponent’s defenses. While this ups the number of Chain Links you control and gets you closer to Rupture, it won’t help with reducing the cost of Fai’s ability or turning on Embercleave or Phoenix Flames ability. It’s still a playable card but it doesn’t synergize great with all the cards that care about Draconic Chain Links. It also suffers a little bit with Quell in the set, as both instances of this can be prevented with a single card if your opponent uses a piece of Quell equipment.
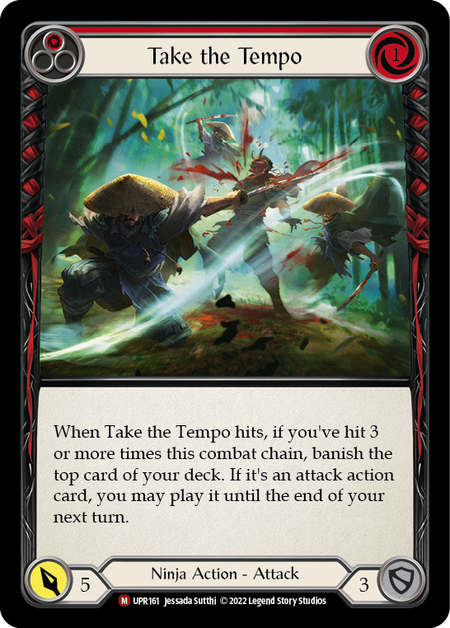
161 - Take the Tempo - B+
The stat line here is what you would expect: 1-cost for 5 Power with 3 block, but it also offers a pretty powerful hit effect. Fai goes wide enough that having hit twice before this isn’t too hard to imagine. If you’ve already hit twice, your opponent is heavily incentivized to cover this up or risk giving you a five card hand going into the next turn. I wouldn’t get too caught up in getting the draw potential turned on though, if your opponent has blocked you out, a 5 power attack to close things out isn’t a bad fail case. It blocks for 3, but you always want to play this really.
162 - Rapid Reflex - C+/C-/D+
A conditional +3 power attack reaction at 1-cost is a bit below rate relative to cards like Razor Reflex that also give you some upside. Even though it’s a Ninja reaction, Rapid Reflex can be played on Generic and Draconic talented attacks in addition to the 4(!) cycles of common 0-cost attacks in Ninja, plus your Phoenix Flames. With so many possible targets I don’t think the 0-costs restriction is a deal breaker and with Phoenix Flames as possible targets it will be hard for opponents to play around this consistently. I expect it will definitely steal some games and can help you force through some hit effects.
Draconic
000 - Blood of the Dracai - D+
Blood of the Dracai seems like an appealing resource card, but to get full value out of it, you then need to play 3 more Draconic cards the turn you pitch this, and they all need to cost at least 1. That’s a pretty niche scenario, especially in Limited, and not worth the defensive liability in my mind. If you just compare this to a Blue pitch that blocks for 3, I think the Blue will be a better card in most cases. I can see some argument that this is playable in Dromai, as it creates an Ash when you pitch it as well, and increases the Red density of your deck for effects that are looking for Red cards. Even then I think it is only fringe playable though.
084 - Flamescale Furnace - A-
Flamescale Furnace seems pretty powerful given the Draconic Talent’s penchant for Red line cards, but ultimately I see this more as a safeguard against all Red hands rather than a consistent source of value in Limited (though it is a good way to generate free Ash as Dromai). To get you any bonus you need to have at least two-red cards in pitch. This means (in most cases) two cards pitched from hand and one card played from hand, in which case this really only benefits you if you are also working with an Arsenal or have a 2-cost action for your fourth card. It’s pretty card hungry and situational, but the ability is an Instant so you don’t break the Chain. If nothing else, Flamescale Furnace is a great defensive option with Temper. Blocking for 3 over the course of the game means you effectively start with 15% more health than your opponent. Dromai gets the most out of this, but it’s a good option for either Draconic hero.
085 - Sash of Sandikai - B+
Oddly, I’m not sure this is any worse than Flamescale Furnace in terms of resource generation in Limited. It’s less conditional and free to activate itself and still gets the benefit of being an Instant and keeping your Combat Chain alive. This won’t really help pay off your Legendary Dragons, but this will help smooth out some of your turns or avoid a back-breaking Frostbite. It loses out on all the defense utility of Flamescale Furnace, but I still think Fai might prefer this to the Legendary.
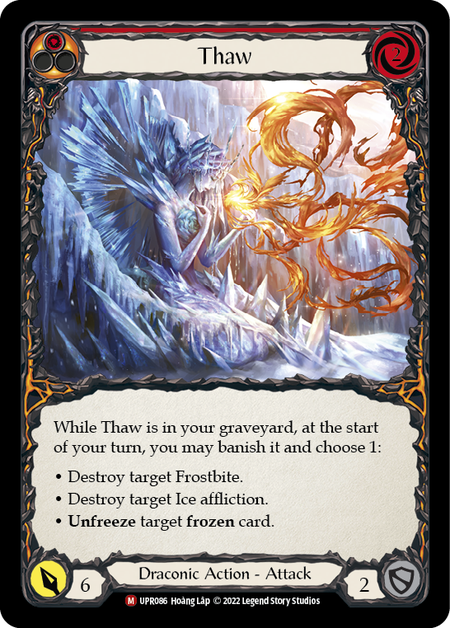
086 - Thaw - A-
Thaw is the first 6-power (non-Illusionist) attack we have seen so far in the set, so it already has me pretty interested given its value as a Phantasm popper against Dromai. It’s also a great play against Iyslander as a two-for-one that you can use as an attack (or block) and then later to kill a Frostbite or another annoying Ice Effect. You aren’t loving this against Fai, but it’s still on-rate as a 2 for 6 and it will be one of the best cards in your deck against the other two heroes. I’m very happy to have this one in either Dromai or Fai, even if it only ever kills Dragons and Frostbites.
087 - Liquefy - F
Liquefy’s value is really determined by how good the equipment is in the set. Is it worth paying 1-resource and 1 card from hand just to remove an opposing piece of equipment? My thought is generally not, primarily because a lot of the equipment in the set can be activated at Instant speed or during damage calculation (i.e. Quell) which means your opponent can still get some value before their equipment turns to smoke. Coupled with the fact that this is highly conditional (must be fourth chain link or higher and still has to hit) means I’m not looking to play this in Limited.
088 - Uprising - B+
A 0-cost card that can give +4 power across 4 attacks is above rate. This buffs your Dragons and Emberblade meaning it's hard for this to ever really be bad, and it blocks for 3 if you really need it. This is a great lead-in to a turn where you can swing with multiple Dragons (turning on Dromai’s ‘Go Again’) or basically any normal Fai turn where you’ll have 3-4 Chain Links. Uprising is good for either hero, but I’m particularly going to be dreading anytime I see Fai lead off with this.
089 - Tome of Firebrand - B
Tome of Firebrand offers a good deal of upside and will probably help enable some of your most explosive turns. However, it doesn’t block at all and is just blank if you aren’t able to get 4 other attacks on the Combat Chain prior to playing this. This makes Tome of Firebrand a great card to help you be aggressive and push through your opponent’s defenses, but a disaster to draw if you are on the back foot and need to heavily block. or Fai, you can play this off two 0-cost attacks and a Blue pitch (plus Emberblade and a free Phoenix Flame), whereas Dromai probably needs to stick a couple of Dragons on the board, in which case you should already be doing fine. In the end, I’m pretty happy to have this in Fai, who seems to be the most aggressive hero in the format, and quite a bit lower on it in Dromai.
090 - Red Hot - B+
Paying 2 for a 4-power attack isn’t a good rate on its face, so you really need to make sure to get to Chain Link 4 for this to be worthwhile. The payoff with Red Hot is decent though. Assuming you are playing this with Rupture active, I think this can generally threaten an additional 2-3 unblockable (except for Ward and Quell) damage in your Red heavy Draconic decks. If you threaten 6+ damage split across the two modes I think you can be pretty happy. This does make Red Hot a viable finisher, and it blocks for 3, so if you can’t get Rupture active it still defends decently. Like most Rupture cards, I prefer it in Fai, who I expect to be able to activate it more reliably.
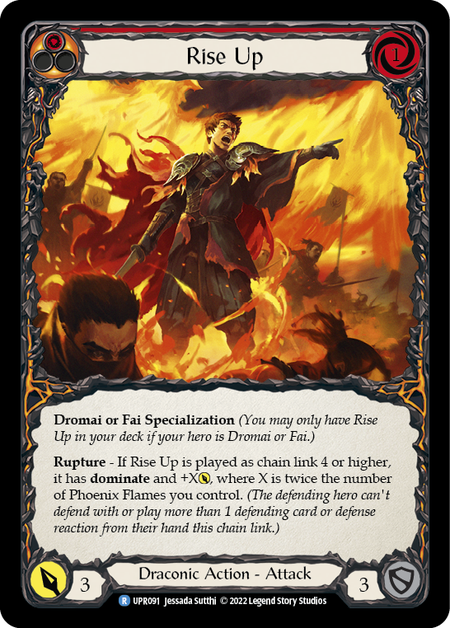
091 - Rise Up - A+
Like the previous Specialization, Rise Up offers another way to close out games, particularly for Fai. Also like Red Hot, this is below rate on its face at 1-cost, 3 power, but with a huge amount of upside. For Fai, I think this can pretty consistently offer 5-7 damage with Dominate. There are a few defensive resources, like Quell, that stop Dominate from being a guaranteed win, but this is still a very viable way to close out games. This won’t be great for Dromai, but this is probably the best card you can have for Fai.
092 - Blaze Headlong - C+
Blaze Headlong is on rate as a 4-power, 0-cost attack with conditional ‘Go Again’. The condition here doesn’t seem too difficult to satisfy though, with so many Ninja attacks having natural ‘Go Again’, all the Invocations fulfilling this requirement, and all the other Draconic Talent cards also being Red. It’s likely to leak some damage, extends your Combat Chain as Fai and is a good way to help you get to Rupture for Dromai. I’m quite happy to run this in both Draconic Heroes.
093 - Breaking Point - A-
Breaking Point offers one of the best payoffs for getting to 4 Chain Links. If Command and Conquer has shown us anything, the on-hit effect of destroying your opponent’s Arsenal is a powerful one and 5-power can be an awkward number to block. With Draconic wanting to go wide anyway, the condition here isn’t too taxing and the fail case of blocking for 3 or just swinging for 5-damage is still totally fine. Breaking Point does get a little bit worse against Iyslander who wants to play a Blue card from Arsenal at Instant speed anyway, so don’t overvalue in that matchup.
094 - Burn Away - C-
Burn Away is predominantly a Fai card, as it’s pretty bad if you aren’t able to banish a Phoenix Flame and Dromai likely doesn’t want to run Phoenix Flames if she has better options. Even in Fai though, it is a bit double edged. 4-power, 0 cost, ‘Go Again’ is definitely a card you want to play, but the cost of banishing one of you Phoenix Flames, you are sacrificing some of your long term potential to play this. If you can pitch this early, it can be powerful in the late game, but it’s a bit conditional.
095 - Flameborn Retribution - C+
I really like the idea of getting value from using cards defensively and Flameborn Retributions offers good flexibility in that regard. 3-power with natural ‘Go Again’ is a bit below rate at 1-cost, but it can do as a Chain opener or extender in a pinch and it’s an awesome way to get Phoenix Flames back into your hand when you use it on defense. To get the Phoenix Flame you need to have taken damage, so this gets a bit worse against IysIander only blocks for 2, but since you are replacing it with a Phoenix Flame I think you are easily getting 3 value out of this when you use it to block. The Phoenix Flame synergy makes this more a Fai card, but Dromai might find room for this as a Red card to make sure your Dragons have ‘Go Again’.
096 - Flamecall Awakening - C+
This is one of the better ways to get more Phoenix Flames going during your turn and more in the Graveyard for future use. Awakening searches a Flame from your deck rather than your graveyard, leaving one available for Fai’s ability and making it pretty easy to play two in a single turn. This helps turn on Rupture or just go wide around your opponent’s blocks. I think the 1-cost here is worth it as it’s drawing you another one damage attack and giving you two Draconic Chain Links off a single card. I don’t think you want to run this in Dromai but if you do end up having to play them, this isn't a bad use for them.
097 - Inflame - D+
Inflame offers yet another way to recur your Phoenix Flames and opens up avenues to play multiple in a single turn. However, you need to have played another Red to turn on the recursion, and without that, Inflame is pretty bad. It also pulls from your graveyard, like Fai’s ability, so you really want to have at least two Flames in the yard prior to playing this, so it’s pretty conditional. At best, it’s two damage and two Chain Links on one card. It might be fine in Fai, though I think there are better ways to get your Phoenix Flames back; Dromai will want to look elsewhere.
098 - Lava Burst - B+
Lava Burst is another good payoff for getting to 4 Chain Links and turning on Rupture. It’s ultimately just damage, but 0 resources for 5 power is crazy efficient and a great way to cap off a long Combat Chain. If you aren’t able to get to 4 Links, playing this for 2 damage is not great, but it blocks for 3, so the fail case here is good enough that I don’t mind playing this in either Fai or Dromai.
099 - Searing Touch - B
Assuming you can get to Rupture, this threatens the same amount of damage as Lava Burst, but at the cost of an additional resource. In exchange, 2 of the damage can’t be blocked (except by Ward or Quell) and you have the option to split the damage across two different targets. The flexibility is pretty nice and this has a bit higher upside as a finisher, but generally I think I prefer the slightly cheaper card. Searing Touch is still very playable and blocks for 3 in the worst case. I don’t mind this in either Fai or Dromai.
100 - Stoke the Flames - C-
I’m not a huge fan of Stoke the Flames. As a 1-cost, 4-power attack with conditional ‘Go Again,’ it’s a bit below rate. Since this only has ‘Go Again’ on hit, you’ll want to save this for later in the Chain so your turn doesn’t end prematurely. Your opponent is pretty heavily incentivized to block this to stop you from grabbing a Phoenix Flame or getting ‘Go Again’, but at 4-power it is pretty annoying to block. Fai might still play this but I’m not interested in the conditional ‘Go Again’ in Dromai.
101 - Phoenix Flame - C+/D
This is maybe a weird card to rate, since it's a token and you don’t need to pick it in Draft, but I did want to talk a bit about the value of putting this in your Dromai deck. You’re very obviously running 3 of these in Fai given all of the synergies at play for him. It’s probably about a C+ value card in that deck, given all the ways to recur it and extend your Combat Chain. In Dromai, I think this is pretty weak filler and would value it around a D. It doesn’t block and you’re reliant on your other Draconic Talent cards to gain access to it. That means if you draw the Phoenix Flames after your Draconic recursion cards, both groups of cards are pretty bad. I also think Dromai wants to be a bit more defensive. In most Dromai decks I want to avoid playing these if possible, but there may be a sub-archetype in Dromai that plays a lot of Draconic Talent cards, Phoenix Flames, and Rupture cards where this is viable. Depending on your Draconic pool in Sealed, you may want a copy.
Elemental Wizard
Iyslander looks to be the most controlling hero in the set. All her Ice effects are designed to slow your opponent's down and make their turns inefficient. There's a bit of Arcane Barrier in the set, but not a ton, so your Arcane damage will put your opponent on a clock. Thankfully, LSS finally gave Wizard so e tools to deal with Allies so the Dromai matchup is winnable. When thinking about playing Iyslander, I'm looking for a good amount of Blues, Ice cards to Fuse and play on my opponent's turn, and some good disruptive effects to keep my opponent's in check.
104 - Encase - B
Encase is one of the first Wizard attacks we’ve seen that can be sent against any target, which is nice, because it (and all the other Elemental Wizard cards that share this text, can be used to kill Allies that would otherwise go uncontested against Wizard. It’s a nice option to have, but all the Fuse effects in the section only apply if they target or hit a Hero. For the most part, I think you’ll want to be sending these against Dromai rather than her Allies, but exceptions might arise where there’s a Dragon you absolutely need to get off the board.
Encase is also one of the first Wizard cards we have seen that comes with a hit effect that impacts your opponent. It threatens to stop them from activating any equipment or hero abilities until the end of their next turn. At 3 Arcane, I think this is pretty likely to make it through your opponent’s defense, but the impact of the hit effect itself is worth parsing in Limited. The impact on equipment isn’t huge: Weapons aren’t affected, nor are Quell and Arcane Barrier abilities. In terms of the heroes: Fai is the only one with an activated ability and this can stop him from pulling a Phoenix Flame out the graveyard. This seems like a decent way to slow down Fai and at 0-cost and 3-block it's still fine in the other matchups as well. You do need an Ice card to fuse this and get the hit effect, but it can also target Dragons, which is nice.
105 - Freezing Point - B+
Freezing Point is a solid finisher in Iyslander. If you stack this with some other Ice effects, you can deal a pretty sizable chunk of Arcane damage in one instance to close out the game. It is a bit card hungry, costing 3 and requiring a Fuse, but even at 5 Arcane this will be pushing damage. It always blocks for 3 as a worst case. For the Elemental cards I’m not too concerned about taking the non-Blue versions as these won’t give a Frostbite when played from Arsenal anyway. Generally, I will want these to be the big hitters that I play on my turn.
106-108 - Sigil of Permafrost - B+/B/C+
Sigil of Permafrost is a nice little Defense Reaction. Iyslander will want to pitching pretty regularly on your opponent’s turn anyway so the 1-cost here isn’t that big of a downside.With Iyslander wanting to be pretty Blue heavy, this should leave you 2 floating resources off a Blue pitch for Waning Moon, threatening two Frostbites as long as you can Fuse. The defense plus the disruption means this fits perfectly with Iyslander’s gameplan. I like the Red version best for it’s defensive value, but I think I would play all three versions pretty happily. There aren’t a ton of attack reactions in the set, but it can give you some nice insurance against Fai’s tricks as well.
109 - Ice Eternal - A-
Ice Eternal is a great way to saddle your opponent with multiple Frostbite tokens, though the rate is pretty steep and you’ll need to pitch at least two cards to do so. It is card intensive, as you’ll want to Fuse this to also get access to the Arcane damage. Though you’ll need a full hand, the multiple Frostbites will also slow down your opponent or end their turn entirely, particularly the Red heavy Draconic decks. It’s Blue so it can be played for Arsenal on your opponent’s turn and it does defend for 3 if you really need.
110-112 - Succumb to Winter - C/C-/C-
Sniping your opponent’s Arsenal alongside a nice chunk of Arcane with this is the dream, but Succumb to Winter is a bit conditional for my liking. I don’t think Fusing will be too difficult, but you also need to have already invested in Freezing your opponent’s Arsenal for it to work. There are only 3 Common Cards (including 1 Equipment) that Freeze and most of those are conditional as well. The fact that this can target Allies and destroy frozen ones is nice, but a very niche circumstance that I don’t expect to arise super often. It blocks for 3 and the Arcane damage is still a good chunk for Wizard (especially in Limited), so I’m still happy to play this, I’m just not really looking to make sure I make full use of the Fuse effect on this one.
113-115 - Aether Icevein - A/A-/A-
Now this is a Fuse effect that I am excited about. In most matchups, I think it’s going to be tough for opponents to consistently block even 3 Arcane in one chunk, so I expect all three versions of this to force a pitch or discard in most circumstances as long as you can Fuse it. Anyone who has played against Ice Lexi knows how impactful this effect can be, and Aether Icevein costs 2 resources to pay off… I think the Red version is best here, but playing the Blue on your opponent’s turn from Arsenal can also be pretty annoying for them. It also defends for 3, so there’s really no downside here.
116-118 - Brain Freeze - C-/D+/D
Brain Freeze has been a tough one for me to think about. At best it trades one-for-one with a card from your opponent. In some cases this can be a positive exchange for you, putting a card that would have attacked for 5 or 6 back on top or taking a card your opponent would need to pitch to fuel their turn. On the other hand, it doesn’t really advance your game plan, only delays theirs. Is this really worth your entire turn? The disaster is playing this and finding no valid targets. So I would be pretty reluctant to play the Blue or Yellow versions of this.
119-121 - Icebind - C+/C/C-
Icebind is the first common way we have seen to Freeze an opponent’s Arsenal. This being 0-cost does mean you can play and Fuse this off a two card hand which is nice, and the effect does still help slow down their turn a bit. I think the Red version of this will still probably get through, but the Yellow and Blue versions are more of a question. I don’t like this, or really any of the Freeze cards, in the mirror, where Iyslander can use their Arsenal at Instant speed, but this does seem decent in the other matchups.
122-124 - Polar Cap - B/B-/C
This is slightly cheaper than Aether Icevein, but offers a little less Arcane Damage and a slightly less disruptive effect. The cost savings doesn’t seem that relevant given the high amount of Blues that Iyslander is looking to run, so I prefer Aether Icevein, but this still seems like a reasonable alternative for Iyslander. The Blue version of this can potentially be covered up by Arcane Barrier more easily in Limited, but I think the Red and Yellow are both strong enough.
Ice Wizard/Ice
125 - Conduit of Frostburn - C+
I like this effect on a piece of equipment that you’ll always have access to when you are able to Freeze your opponent’s Arsenal than I do when it is attached to a card like Succumb to Winter. There isn’t a window to activate this after your opponent has declared they are going to take the Arcane damage, so make sure you are popping this on an attack that you are confident is going to make it through. Even though I’m not super high on the effect it’s got decent utility and the fact that it also has Quell means I’m happy to have this in all my Iyslander decks.
126 - Ice Hex - C
The previous section of cards was all the Fuse payoffs for Iyslander. We’re now moving into the cards that you’ll be wanting to use to Fuse. Here I’ll have a strong preference for Blue cards. Iyslander can’t easily play multiple Wizard actions on her turn, so the play pattern you really want to set up is: Play a card on your turn, fusing with a Blue Ice card, if needed; Arsenal that card; and then play it at Instant speed on your opponent’s turn for it’s effect plus a Frostbite.
Ice Hex is a good example of that. It’s Blue and it turns any unpaid Frostbite tokens into 1 damage Arcane pings on your opponent’s end step. It’s pretty expensive at 3-cost and I doubt you’ll be stranding your opponents with Frostbites all that often in Limited, so it’s not hugely impactful here. If you do manage it, Ice Hex likely makes your opponent think about whether they want to take the Arcane or give up their Arsenal card. Oddly, this might be best in the mirror, as Iyslander is the Hero in the format most likely to only play 1 card on her turn and have a Frostbite left over if you played a Ice card at Instant speed.
127-129 - Aether Hail - C+/C/B-
While all the Elemental Wizard cards were slightly below rate on Arcane damage due to their (sometimes) powerful Fuse effects, the Ice Wizard cards get back to basics. Aether Hail offers you the same damage ratios as Scalding Rain but with the added benefit of being an Ice card for Fuse purposes and the ability to target Allies. I’m highest on the Blue version for the reasons discussed above. Played at Instant speed, you can attack with this and Waning Moon for 5 Arcane and a Frostbite with just a single Blue pitch. The Yellow and Red versions are fine and at least they still pair nicely with Waning Moon.
130-132 - Frosting - C/C/C+
Frosting is your Ice Wizard Zap equivalent. At 0-cost Frosting has the benefit that it can be played without pitching if you need to block heavily, so I give it some credit there. It’s not pushing much Arcane, but since it also helps you Fuse you’re always running the Blue version and the Red and Yellows can be filler.
133-135 - Ice Bolt - C-/C-/C
Moving up the scale, offers you 5 Arcane damage for 2-resources at Red. While potent, this is my least favorite of the three “standard” Ice Wizard cards because it is the hardest to pair with Waning Moon on your turn or your opponents. The Blue version is still fine for the synergies we’ve previously covered; the Yellow or Red and certainly help close out games, but they aren’t my top picks.
136 - Coronet Peak - B
Coronet Peak’s ability isn’t that exciting. Paying 3 resources for your opponent to pitch or discard as your entire turn doesn’t feel great (Dromai is probably happy to pitch a red and get a free Ash anyway). I would almost always value getting a Blue Arsenal card more than activating this, but if you do somehow end up with two blue cards in hand and nothing else to do, I guess this is fine? The block value alone still makes it a solid Equipment, but I don’t anticipate using the activated ability very often in Limited.
137 - Glacial Horns - B+
Glacial Horns is probably the best way to Freeze in the set. You don’t have to worry about drawing a Freeze card the turn your opponent doesn’t set an Arsenal and you can time using this for a pivot turn or a chance to kill the Arsenal card permanently. The fact that this hits the Arsenal and an Ally is awesome. It gives you some nice insurance against Dromai dropping a big Dragon when you don’t have enough Arcane damage to kill it immediately.
138 - Channel the Bleak Expanse - D
I want Channel the Bleak Expanse to be good, but it just doesn’t really impact that many cards in Limited. It affects a few Dragons and Fai attacks, but many of those are Majestics themselves that you won’t see very often on the battlefield. It is a Blue ice card that you can use to Fuse and play from Arsenal for a Frostbite, but in 90% of games I don’t think this will have an impact whatsoever on the game. Blocking for 2 just adds to the injury.
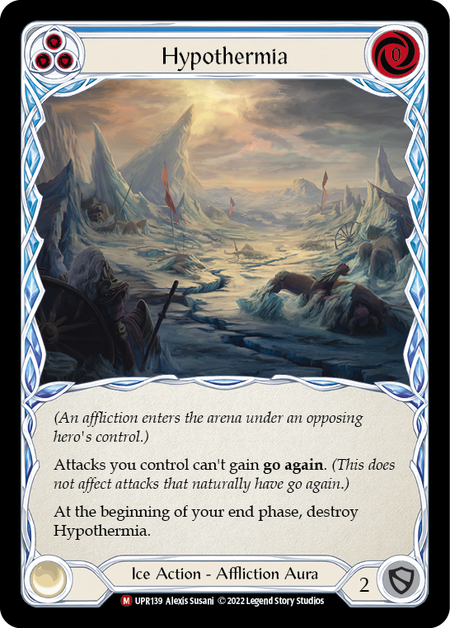
139 - Hypothermia - A
Hypothermia is much better. This turns off Emberblade, a few Fai attacks, and all of Dromai’s Dragons. This can go a long way towards slowing down your opponent. Even more breaking this can be played as an Instant from Arsenal in response to your opponent declaring an attack that would otherwise have gained ‘Go Again’, bringing their turn to a screeching halt. I’m kind of surprised this costs 0, but I love it.
140 - Insidious Chill - A+
Insidious Chill is pretty gross. It’s essentially three instances of Aether Icevein on a single card that go off each time you Ice Fuse. The Ice fusions themselves are already disruptive to your opponent, so coupling them with an additional discard effect is going to be really tough to play through. This seems like a great way for Iyslander to steal back some tempo from the more aggressive heroes in the format. The fact that both this and Aether Icevein cost 2 Resources is great and means that the combo will always strip two cards. This also helps fuse and can be played for a Frostbite on your opponent's turn as well.
141-143 - Isenhowl Weathervane - C-/D/D-
I don’t love Isenhowl Weathervane because it's card hungry, doesn't block well, and doesn't do anything on its own. The effect threatens to brick your opponent's next turn entirely, but to get this to go off you need at least a 4 card hand (pitch, Weathervane, your attacks, and an Ice card to Fuse). I think Iyslander wants to be fairly defensive, so I don't think there will be too many windows to play this without also giving up a ton of damage. The Red version is my favorite for once. It doesn't really help to play the Blue version from Arsenal because you can't play another Wizard action and Fuse the same turn.
144-146 - Arctic Incarceration - C-/D+/C+
I prefer Arctic Incarceration to Weathervane, but it's still not great. Incarceration is free and doesn't require another action to deliver the Frostbite. But this only really serves to disrupt your opponent and doesn't threaten any damage of your own. I think the Blue version is fine to play on your opponent's turn for two Frostbites at 0-cost, but you can probably do better than the Yellow and Red.
147-149 - Cold Snap - D/D-/C
Cold Snap offers another way to Freeze your opponent's Arsenal or Allies, but they can still choose to pay the cost to avoid it. I have a hard time believing this is worth a full card and pitch. The Blue can be paired with Waning Moon for 3 Arcane and a Frostbite, which isn't too bad. However, the only reason I would consider playing the Red and Yellow is if I needed to increase the number of Ice cards in my deck.
Wizard
165 - Waning Moon - N/A
Waning Moon works great in Iyslander. She wants to play a good number of Blues, so it's a good way to supplement her Arcane. The fact that it's an Instant pairs great with Iyslander's Instant speed actions from Arsenal on your opponent's turn and can give you a bit of reach at the end of the game to beat out lethal damage on the stack. It really pushes Iyslander’s desire to have a Blue in Arsenal and makes me value Actions at 1-cost more highly.
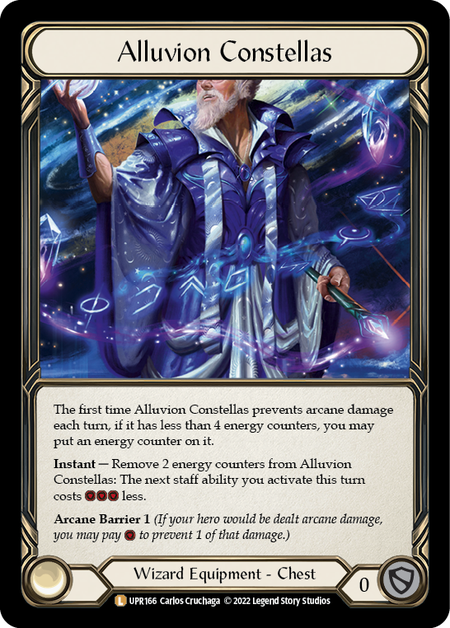
166 - Alluvion Constellas - B
This pays you back with resources the first time you pitch for Arcane Barrier each turn. Two uses and you can cash in the counters for a free Waning Moon activation. Against Iyslander, I can definitely see getting 3-5 activations out of this, but outside of a few fringe Dromai cards that’s the only Arcane you’ll be facing. So realistically this is basically blank in two-thirds of your matchups, but gives you a huge edge in the mirror, making it very challenging to rate. In Limited, I still think this is a great card because of how impactful it can be in that specific matchup, but I’d still look for a second chest piece to run against the other heroes.
167 - Spellfire Cloak - B+
Between her hero power and Waning Moon, Iyslander really gets value out of playing on her opponent’s turn, so the condition here is barely a downside. A free resource on demand is a solid piece of equipment in Limited and this has Arcane Barrier as a defensive benefit during the rest of the game. As a fringe case, the free resource on your opponent’s turn might also save you a card or your life via Quell/Arcane Barrier if you are strapped for resources. could also I’m really happy to pick one of these up for Iyslander.
168 - Tome of Duplicity - D
Tome of Duplicity is one of the only ways in the set to play a non-Blue on your opponent's turn or to play multiple spells on the same turn. This might let you catch some people with their shields down, but it’s really expensive at 3 resources. So to play this and the spell you draw, you are (usually) looking at Tome plus two pitch cards. But on a three card hand I would almost always rather just fire off a Wizard attack and Waning Moon. Maybe this can help in the Wizard mirror, but generally I am not putting this in my deck.
169 - Rewind - C
Rewind is a tax on your opponent's resources. They get the card and action point back, so they can, in theory, just replay whatever you countered. But, they are down whatever resources they invested in it. I don't like this against Fai, who plays very few non-attacks anyway, but has uses against Dromai and Iyslander. Countering one if Dromai's expensive Dragons can strand them without the resources to recast. Against Iyslander you can counter a card from Arsenal played on your turn and they'll be unable to replay it at Instant speed. It has some utility, but it is a bit narrow.
170-172 - Dampen - D/D-/C-
Dampen is below rate from your standard Arcane damage spells but offers some damage reduction on incoming Arcane in exchange. I don't think this is very good, because the effect is basically irrelevant outside if the mirror and Iyslander can just fire off her Arsenal in response to you playing this to dodge the damage reduction. The Blue is probably playable in the mirror to respond to your opponent's Arcane spells.
173-175 - Aether Dart - C-/C-/C-
This is a strictly worse version of Frosting in the set. It has the same damage and block, but can't help you Fuse or grant Frostbite from Arsenal. It’s filler.
176-178 - Read the Ripples - C/C/D
Read the Ripples doesn’t seem to do much at first. Playing this represents essentially your entire turn since it doesn't have 'Go Again,' but it does turn on Waning Moon, which can be activated as an Instant. So this does let you attack for 2 Arcane and keep an Arsenal off a two card hand, which makes it fine, but not really exciting, especially since this only blocks for 2. I don’t value the Instant-speed potential of the Blue very much. You really want to get a Blue Ice card for Arsenal, but three instances of Opt 1 is much worse than Opt 3 and hurts this a bit.
179-181 - Singe - C+/C+/C+
This card is an All Star against Dromai. Using this to kill up to three 1-health Dragons off a single card is a huge blowout. This also pairs quite nicely with Waning Moon off a Blue pitch, which essentially bumps this to 3 Arcane. The Blue doesn’t do as much, but killing a newly created Dragon before it can attack does make it worth running even if you aren’t getting the Frostbite. The Blue can still be 4 Arcane with Waning Moon on your opponent’s turn but the effect is useless against the other Heroes, so make sure you side the Red and Yellow versions out.
Generic
182 - Crown of Providence - B
Crown is a good defensive piece just for its block value. The filtering ability is a nice bonus, and there are a few effects in the set that threaten to destroy a card in Arsenal, but that’s not the main reason you are running thisI also wouldn’t hesitate to cash in the block at an ideal time even if I didn’t have an Arsenal. This is probably a little more valuable in Fai and Dromai, since Iyslander can (and wants to) play her Arsenal on the opponent’s turn anyway. Don’t expect this to save your Arsenal against Iyslander’s effects, as you won’t often have the option to Defend with this before they resolve.
183 - Helio’s Mitre - C-
I think it’s an awesome idea to create equipment tokens that everyone in the set can use. It helps reduce some variance if someone just doesn’t open or draft a piece of Arcane Barrier equipment. It’s a good fail safe, but Helio’s Mitre is very inefficient at 2 Resources to prevent 1 Damage. That said, the only other head slot equipment we have (besides the Legendaries) is Glacial Horns, which means this will be Fai and Dromai’s new favorite Hat. For Iyslander, I think you prefer Glacial Horns, but you may want to sideboard this in for the mirror. It’s not good, but it is what we have.
184 - Quelling Robe - C+
I think the series of Quelling equipment offers a perfectly reasonable option in every slot, although the Class and Talent equipment is usually preferable. While the other options might be better these are very flexible, making them decent early picks that allow you to stay open. The Robe slot is potentially the most replaceable, as all three heroes have alternative options here. Both Sash of Sandikai and Spellfire Cloak offer on-demand resources, and Cloak has Arcane Barrier. Generally, I think those pieces are a bit better, but, if you expect to be on the defensive (vs. Fai for example) Quelling Robe might offer a better defensive option.
185 - Quelling Sleeves - C-
Quelling Sleeves is maybe the worst of the set. All three heroes again have other options in the arms slot and most of those options also offer some defensive utility. Heat Wave, Silken Form, and Conduit of Frostburn all have Quell themselves, so those are strictly better options if you can find them. If you find yourself without a better option, these will do fine though.
186 - Quelling Slippers - C+
This is best in slot for Iyslander by virtue of being the only leg slot available to her, so don’t wait to pick one up for her. For Dromai and Fai, this competes against Silent Stilettos and Tide Flippers, both of which offer Arcane Barrier and some offensive utility as well. Again, both the class options are better, but this is a fine alternative.
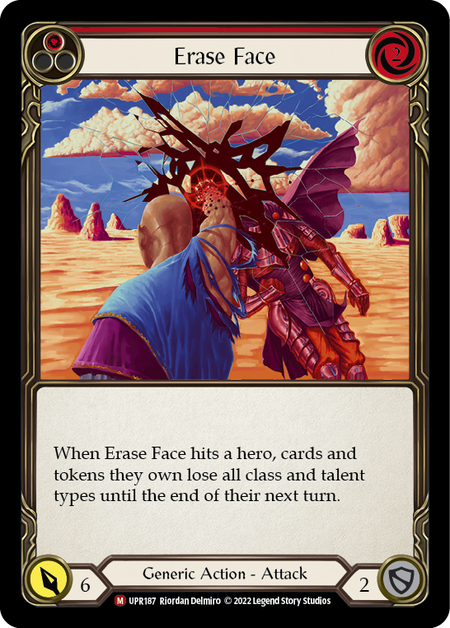
187 - Erase Face - A+
Erase Face is a hugely disruptive card for the set and devastating for Fai. Fai’s ability and weapon, Rupture, and Fuse all care about Class and Talent types. Turning that off for the next turn really limits the offensive potential. As a 6-power attack, this is also awesome against Dromai and it just hits really hard. Playable across all three heroes in all three matchups, Erase Face is one of the best cards you can open.
188 - Vipox - B+
Vipox punishes card-hungry heroes and greed pretty hard. Play this and your opponent is kind of forced to give up at least one card from hand or let you get some great value. All the heroes in the format are a little card hungry, but none more so than Fai. That said, Fai can maybe make the best use of this, it’s a great target for Tide Flippers and the threat of this backed up by an attack reaction is scary. If you are already on the front foot and your opponent is likely to block heavily anyway this is a little less compelling, but it also blocks for 3 if you need it to.
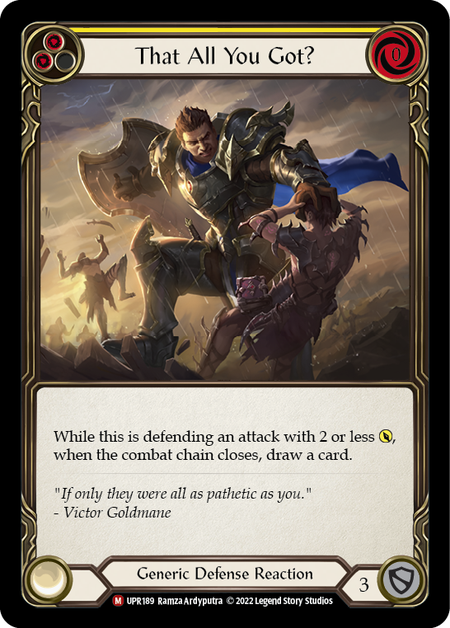
189 - That All You Got? - A
I’m pretty high of Defense Reactions in general and That All You Got? is an excellent one. There are plenty of small attacks running around in this format between the Ashwings and Phoenix Flames, so you should have some decent targets for this. Blocking with this and getting the card back is awesome, but it’s also a fine play to fight off an attack reaction or something with Dominate. This might be a little worse against Iyslander, but even she will probably run a few attacks in Limited.
190 - Fog Down - C
Fog Down is pretty good against Dromai and pretty weak against Fai and Iyslander. Ninja and Wizard just don’t really have that many non-attacks with ‘Go Again’ in the first place, so it’s just not worth 3-resources and a card to turn it off. Dromai, on the other hand, does. This stops her from attacking the same turn as any of her Invocations and might make it hard for her to play a Red and give anything already on the board ‘Go Again.’ It does block 3, but I’m still only playing this against Dromai.
191-193 - Flex - B-/C/C
Flex is our first non-Majestic 6+ power card! Kind of. Unfortunately, it takes a pitch and pump to get it there, but that’s something. I’m happy to pick up the red just for the ability to break Phantasms. Outside of that, Flex is on-rate for power and offers you a nice little resource sink if you find yourself with extra resources and are able to pump the power.
194-196 - Fyendal’s Fighting Spirit - A-/A-/C-
This gives up the ability to break Phantasms at both Red and Yellow pitch and even rewards you with 1 Health for doing so, as long as your opponent is higher in Life. That makes it one of the better poppers in the set. It’s expensive at 3-cost, but it hits hard and gives you a bit of possible upside if you need to attack with this in other matchups. The Blue version drops off pretty significantly.
197-199 - Sift - C/D+/D
Sift can help fix some of your hands, but using a full card to do so is a pretty high price. This blocks for 3 and does have some limited utility. The Red is probably playable in Dromai. It turns on ‘Go Again’ and could help you dig for resources/your best Dragons and it does turn on Waning Moon in Iyslander cheaply. You’re probably not happy to play it, but it can be filler.
200-202 - Strategic Planning - C-/C-/C
Another card that doesn’t do a whole lot. I think the best use of this may be putting a Phoenix Flame on the bottom of Fai’s deck rather than recurring something of your own. Again, it pairs well with Waning Moon for Iyslander, letting her attack with and still set an Arsenal off two cards. If you do have some bombs in your deck, you might value this a little more highly.
203-205 - Brothers in Arms - B+/C-/C-
Our one and only common popper in the set: Long Live Brothers in Arms! Pick the Red ones like they are Rares though, because these will be snapped up pretty quickly. Outside of the Red, this isn’t super exciting. It’s an on rate attack at the end of the day. The ability to add defense here is decent, especially with other pitch outlets like Quell in the set, but not enough to make it a high pick.
206-208 - Critical Strike - C+/C/D+
Critical Strike is surprisingly playable for a blank attack. The Red version is a strong attack that works well for Fai and even Iyslander. It defends well and both the Red and Yellow come in at good breakpoints. I think the Blue is the worst, but it can function as a resource card.
209-211 - Scar for a Scar - B/C+/C+
Nice to see the return of the old classic! Scar was great in WTR Limited as a strong, efficient attack that let you stay open early in Draft’. I expect it to be much the same here. The Heroes here seem a bit more synergy driven than their WTR counterparts, but this should still slot well into basically all of them. It particularly fits well in Fai’s go wide strategy, but it’s still good enough to be playable in Dromai and Iyslander. The Red is best for the power and Dromai synergies, but Yellow and Blue aren’t bad as resource cards.
212-214 - Trade In - C+/C-/C-
Trade In offers a nice bit of hand fixing. You really want to be able to play this from Arsenal for the ‘Go Again,’ otherwise, I don’t think this is worth it, just to try to upgrade your Arsenal for next turn. Dromai is the best fit for this, or at least the Red version, using it to turn on ‘Go Again’. Iyslander probably doesn’t want this clogging her Arsenal. While Fai really wants as much Draconic as possible, he’ll probably need some Generic “Go Again’ to fill out his go wide strategy more generally.
215-217 - Healing Balm - C-/D/D-
Healing Balm just isn’t very good. Unlike Sigil of Solace, this take your action point and doesn’t have ‘Go Again’ so this ends your turn. With Arcane damage in the set, this could potentially offset some of the Arcane you have taken, but I don’t think you really want to stop pressuring Iyslander to play this. The Red version can offset a couple Phoenix Flames or Ashwings, so it is the most playable, but I don’t love any of them.
218-220 - Sigil of Protection - C-/D+/D
Ward makes me a little nervous with so many 1 damage pings floating around in the set. This does give you some resilience to Iyslander’s bigger Arcane attacks so you might side it in for that. Without ‘Go Again,’ however, this ends your turn. The best use is probably in concert with Waning Moon, but I’m probably siding this out against the Draconic heroes.
221-223 - Oasis Respite - B-/C/D+
Similar to Sigil of Protection, but instead of the block value, we get Oasis Respite and instant speed and with a possible point of life gain. That makes it far superior to the former in my view. As an instant it dodges some of the concerns about the pings and it can represent up to a 5 point life swing. I’m quite happy to play the Red version against any of the opposing heroes, but I think it will really shine against Iyslander’s Arcane damage. You do lose out on some of the Iyslander synergies, but that is a small price to pay. This is a good early pick to keep you open.
Conclusion
That's it! Thanks for taking the time to read FAB Foundry's latest Limited Set Review! I'm available on Discord (AnthonyJ#4980) if you ever want to chat Limited and in the North American Playtest League starting soon! Special thanks to Team Foundry for their feedback and insights from Vegas!
Let me know your thoughts on the cards, their ratings, and the Limited environment in general, especially if you were able to make it to a World Premier.
With Limited Road to Nationals on the horizon, it's time to hone those skills and it looks to be a fun and fiery ride. See you on the tables this weekend!